Introduction to Activities
A task or process consists of sub steps or tasks that once complete result in the entire process being complete. In K2 blackpearl, the activities perform the tasks or sub steps that make up the entire process. The activity may contain a number of individual smaller steps e.g. document retrieval, database interaction, provide interaction with a web form for the destination user and so on. Once all the requirements for the activity are complete, the next Activity can be pursued or if all the required activities have been pursued, then process is complete. Activities are linked by Lines, the line determines the execution path followed for the process based on the outcome logic of the activity.
In this topic the fundamental Activity Types and their use will be discussed.
Start Activity
 |
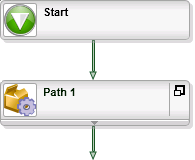
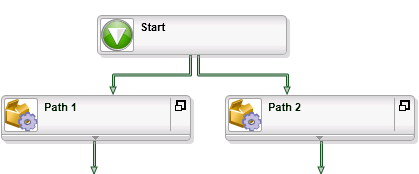
The Start Activity is a mandatory and default component of all processes created within K2 blackpearl. The Start Activity is the logical beginning of a process. The Start Activity may be linked to any number of Default Activities creating Serial or parallel execution paths in the process. |
|
Sequential Paths |
Parallel Paths |
Default Activity
To add the Default Activity to the design canvas, browse to the Activity Wizards section in the Toolbox. Click and drag the Default Activity onto the design canvas, unlike the Start Activity a Default Activity must be added manually by selecting the the item from the Toolbox and adding it to the design canvas.
 |
The default Activity is the basic building block of all processes. A Vacant (Vacant refers to a default activity that does not contain any event items) default activity is added manually by clicking and dragging the DefaultActivity onto the design canvas. |
Default Activity Building Blocks
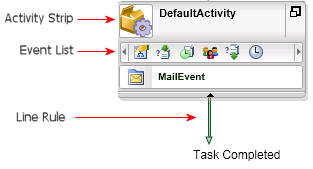
The Default Activity is composed of a number of sub components which are the following:
- Control Buttons
- Activity Strip
- Event list
The Control Buttons
The Control buttons enable the user to easily access the features of a default activity.
| Default Activity Control Buttons | ||
|---|---|---|
|
|
Minimize / Maximize |
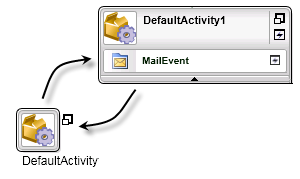
The Maximize/Minimize button enables the user to minimize and maximize the Default Activity. The image below illustrates how the Default Activity changes in appearance to be smaller, slightly bigger than the icon. The only control remaining is the maximize button which will restore the Default Activity to it's original configuration.
|
 |
Default Wizard | The default wizard can be run by clicking the Default Wizard button. |
The Activity Strip
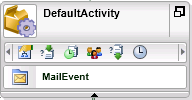
The Activity strip provides access to the Properties and configuration settings of the Default Activity. The Activity strip's population of items depends on the number of items that the Activity strip hosts and is populated dynamically according to the items included in the strip.
| The Activity Strip Commands | ||
|---|---|---|
|
|
Default Activity Strip |
The default activity when loaded onto the design canvas, includes a number of default items that can be user configured. Note: At this point the Default activity is 'empty' as no event templates are included |
|
|
Activity General Properties | The general property wizard contains user definable criteria for the Activity namely the Name, Description, etc. |
|
|
Preceding Rule | The Preceding Rule determines the conditions under which a new activity instance can be created. |
|
|
Activity Start Rule | The Start Rule determines when the activity is started |
|
|
Destination Rule | The Destination Rule determines, based on the outcome of the event items which user, users or user group to receive the Activity as a Worklist Item |
|
|
Succeeding Rule | The Succeeding Rule defines the conditions that allow the activity to end. |
|
|
Activity Escalation | Activity escalation is user configurable and determines how long the Activity will be active and not affected at run time once the process has started. The escalation may be configured to repeat or to escalate to another destination user to process the activity as a worklist item. |
